How to installation firmware using ODIN on Any Samsung device
Disclaimer :
This guide for educational purpose only, I am not responsible if your device increasingly problematic after following this tutorial. (Do With Your Own Risk )
Preparation stages :
Download all files of below :
Download Your Original Stock Firmware ↦ usually, consists of a PDA, AP, Modem, Phone, CP, BL, Bootloader, and CSC file depends on the type of your samsung.
Download Samsung USB Driver.zip ↦ Usb driver for all Samsung device, if you already installed KIES on your computer than this download can be ignore.
Download Odin3 Latest version the Samsung Android Flashing tools↦ this is a latest version of Odin3 tool flasher for update firmware your Samsung devices
Starting installation process :
1. Install Samsung USB Driver on your computer and make sure it completely work.
2. Run Odin3.exe, and leave it open on your desktop.
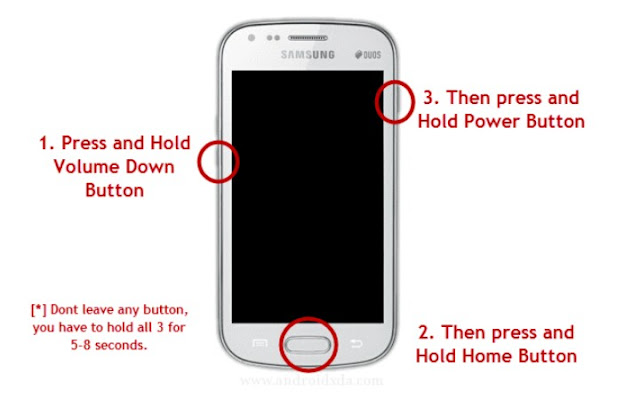
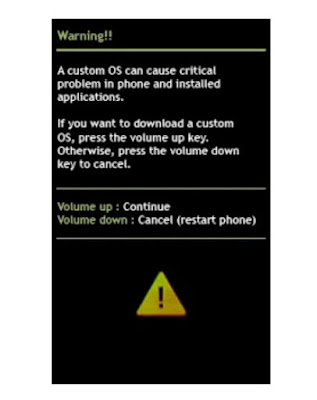
3. Now turn off your device, after completely turn off press and hold Volume Down + Home + Power button until you can see Warning Sign. see simulations below.
2. Run Odin3.exe, and leave it open on your desktop.
3. Now turn off your device, after completely turn off press and hold Volume Down + Home + Power button until you can see Warning Sign. see simulations below.

4. On Download Mode windows press Volume Up and then connect your device to computer.

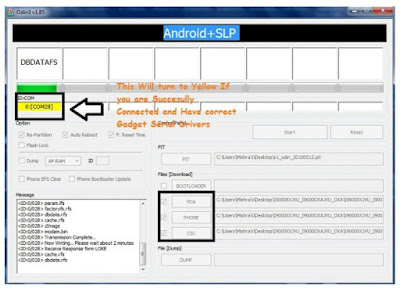
5. If Samsung USB Driver already install right on your computer then Odin3 will recognize your device as another COM Port.
6. Next, check the “Auto Reboot” and “F. Reset Time” options in Odin Tool. Note : DO NOT PUT .PIT FILE AND DO NOT, I REPEAT, DO NOT TICK REPARTITION.
6. Next, check the “Auto Reboot” and “F. Reset Time” options in Odin Tool. Note : DO NOT PUT .PIT FILE AND DO NOT, I REPEAT, DO NOT TICK REPARTITION.
A. If your ROM is a single .tar.md5 package click on the AP/PDA button and browse to the .tar or .tar.md5 file that you extracted in step 1 and select it.
B. If the package has more than one .tar archive then they will be labelled with PDA/Code, Phone/Modem and CSC. Just put them in the corresponding section of Odin like below
BL = BootloaderAP = PDA (CODE)
CP = PHONE (MODEM)
CSC = CSC

7. Finally press the start button to begin flashing the firmware update on your device.

8. Done, now you can disconnect your device.
Best Regards,
Mas Teknik
Advertisement

